
Running your first audit, start to finish
A walkthrough of creating a new audit, recording observations against it, and reading the results.
Every audit in Dental Audit follows the same shape, regardless of subject: pick a built-in or custom audit type, work through one or more structured sections recording what you observe, then submit. Once submitted, the app turns your entries into a results dashboard with charts, a plain-language summary, and space to record a discussion and action plan — ready to export as a PDF for your CQC file or team meeting.
This guide uses the Hand Hygiene Audit as the example, since its mix of field types — yes/no toggles, multi-select tags, and free text — represents most of what you'll see across the audit library.
Before you start
Audits are created from the dashboard's + New Audit button. You can build your own custom audit templates too, via Audit Builder on premium — this guide covers running a built-in one.
Create the audit
Choose what you're auditing, then fill in the context — who's auditing, over what period, and by what method.
Pick an audit type
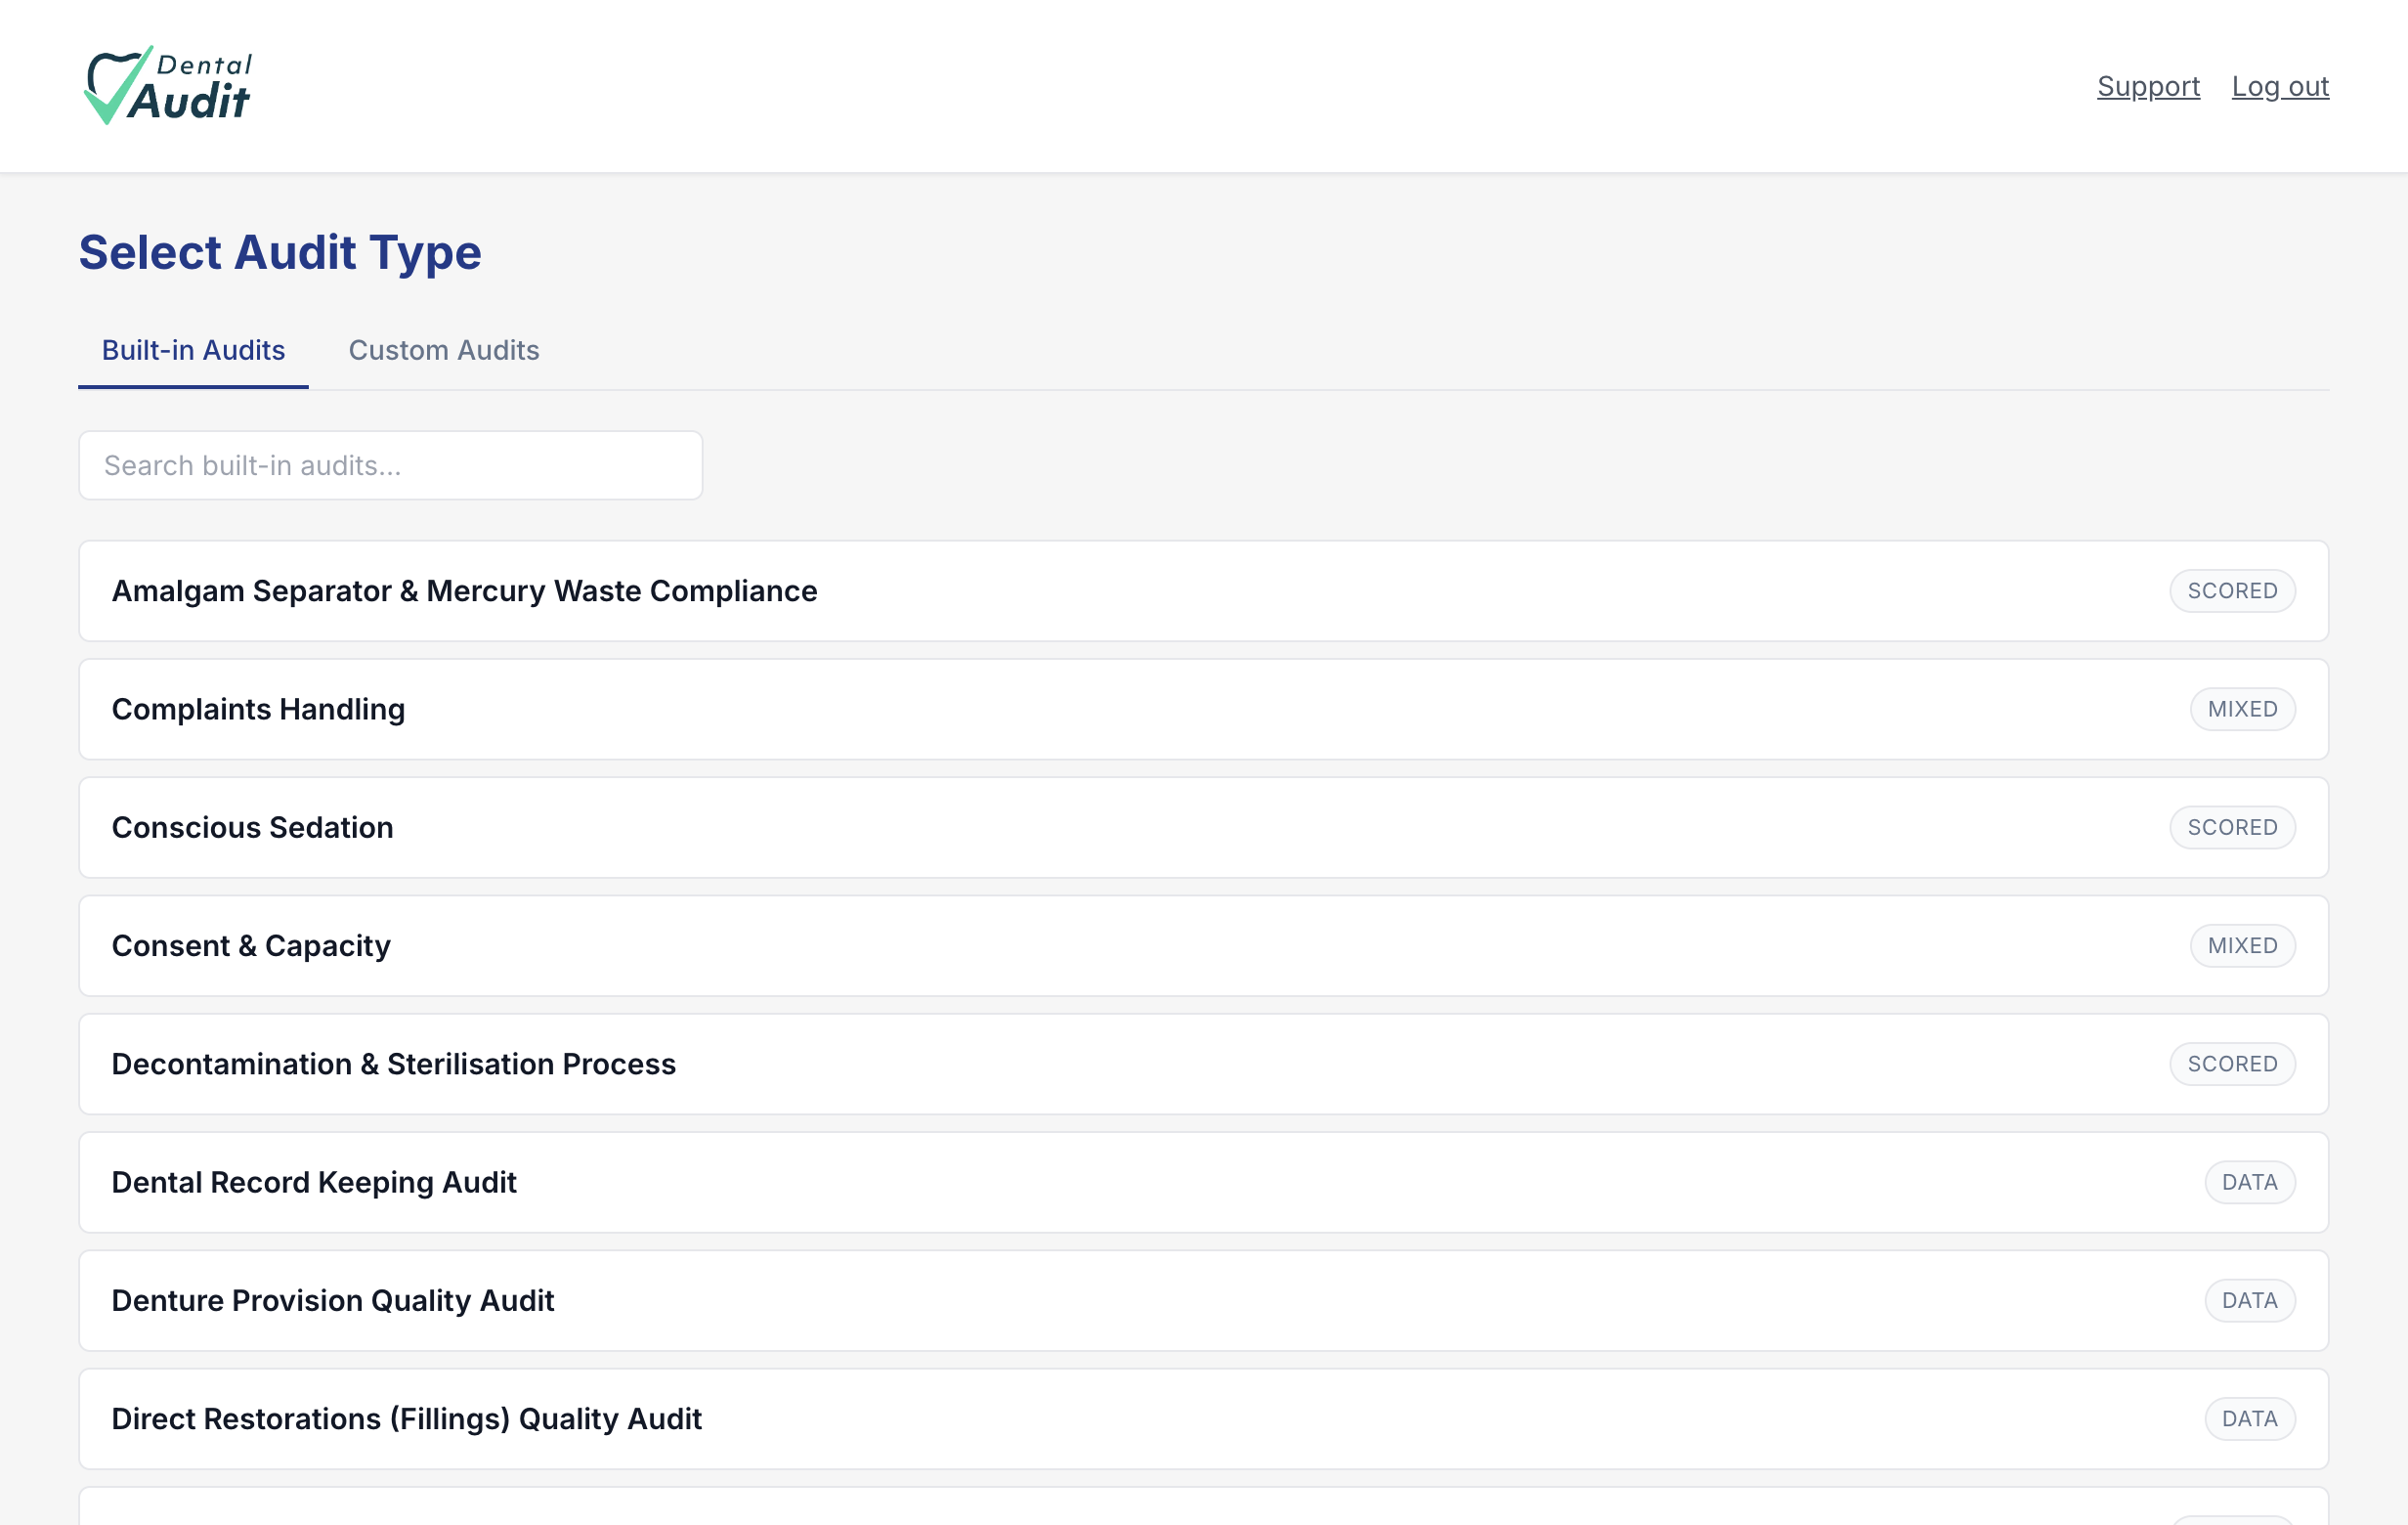
Clicking + New Audit opens the audit library — over 20 built-in templates spanning clinical, compliance, and operational areas, each tagged by the kind of data it collects (Scored, Data, or Mixed). A search box narrows the list if you know what you're after. We'll select Hand Hygiene Audit.
Fill in the audit details
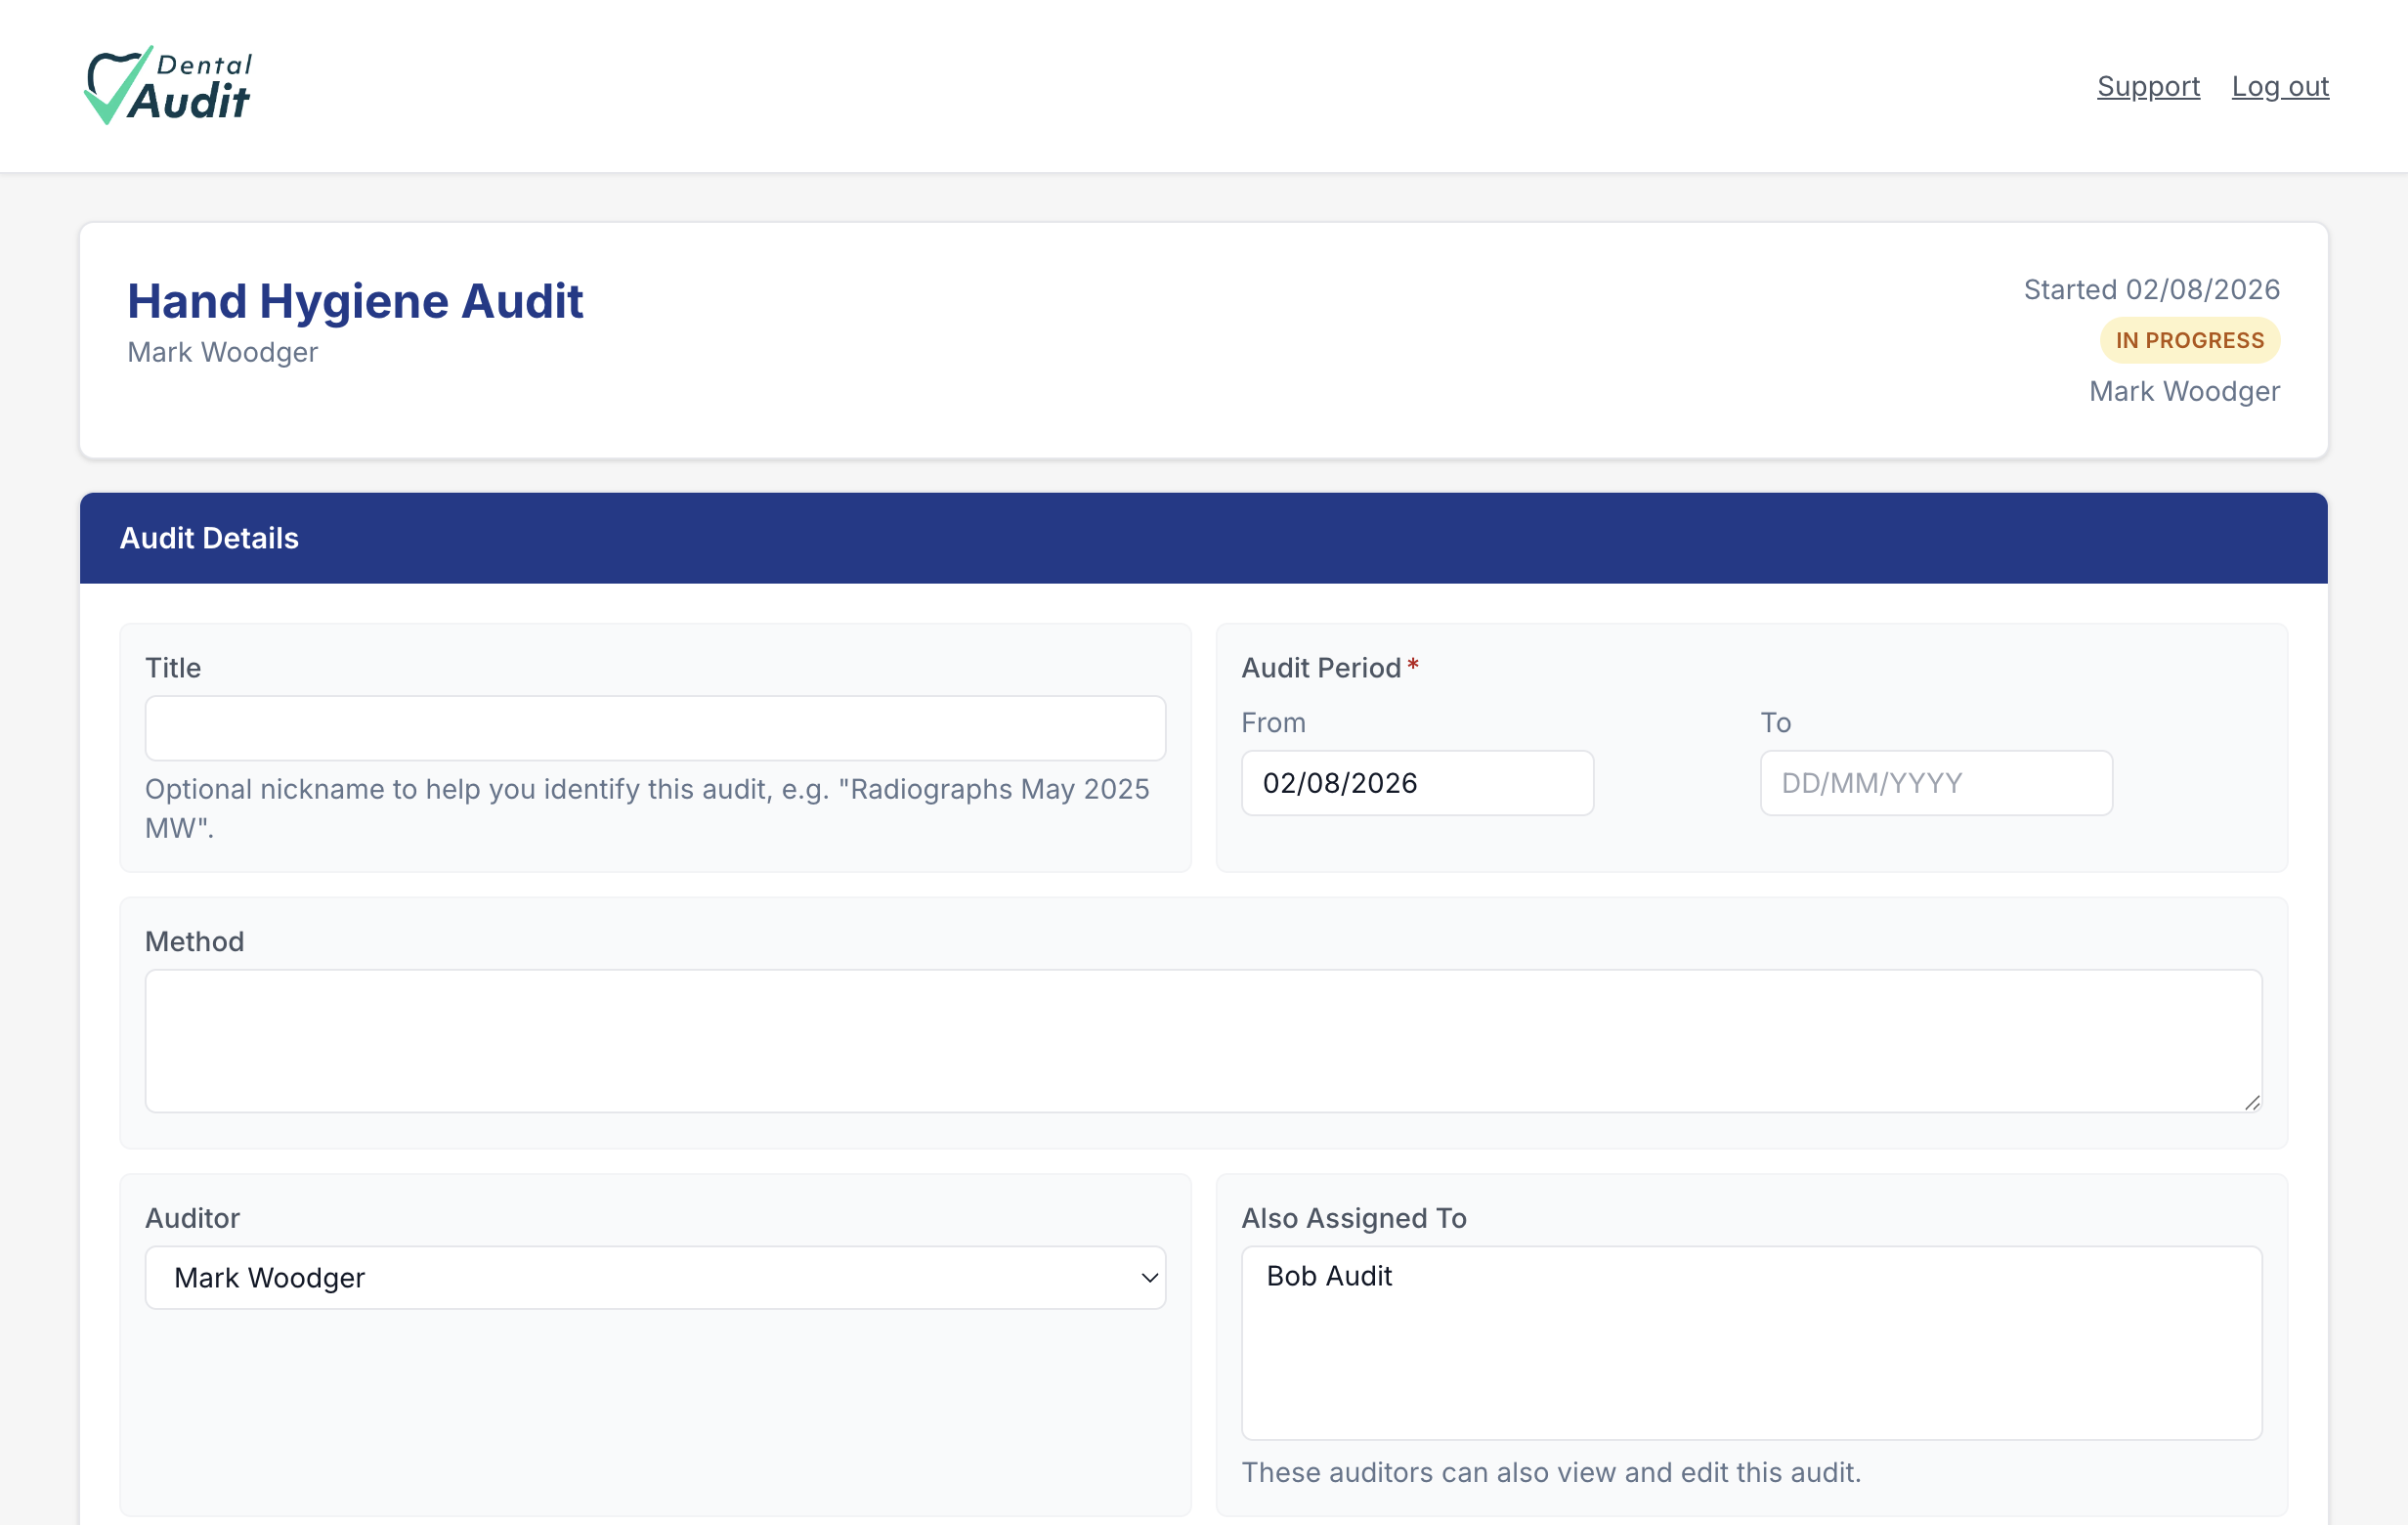
Selecting a type immediately creates the audit in In Progress status and drops you into its form. The top section captures the paperwork: an optional nickname, the audit period, your method, and who's assigned. Everything on this form autosaves as you go — no separate save step needed.
Record observations
Each audit section works as a repeatable mini-form: fill it in for one instance, add it to the list, then repeat for the next.
Add an episode of care
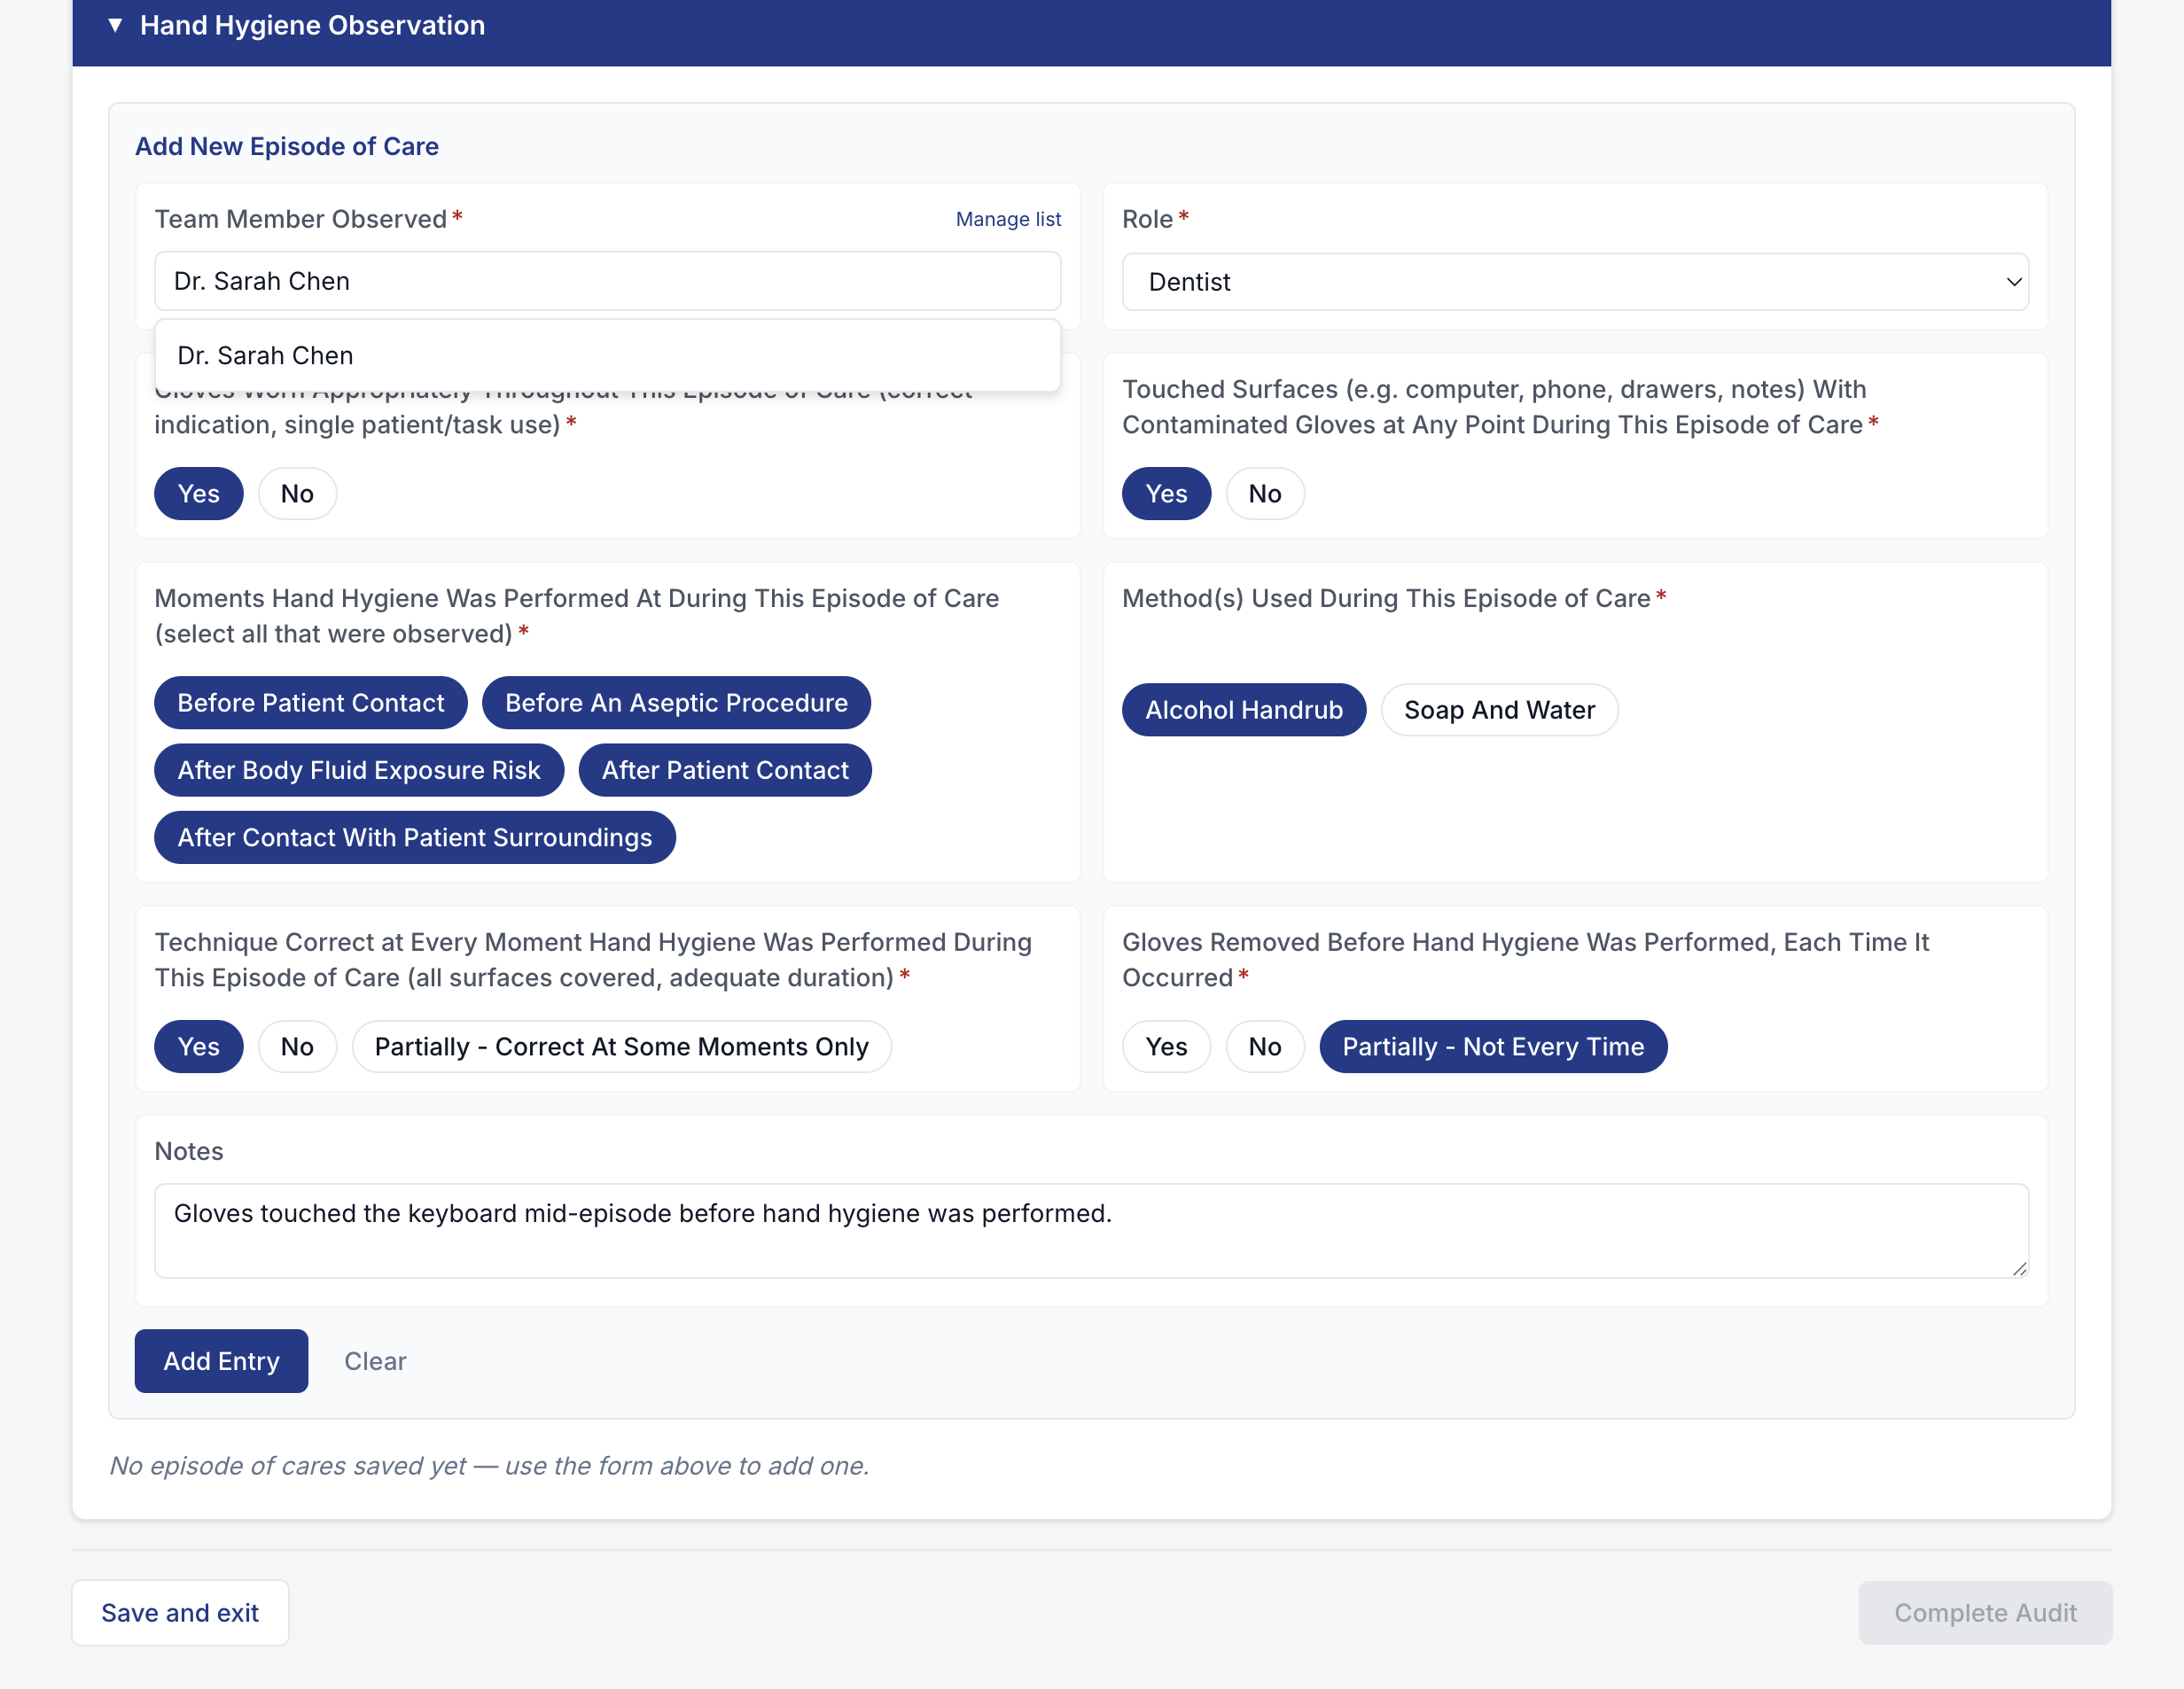
For a Hand Hygiene Audit, one "episode of care" is one observed interaction between a team member and a patient. We logged Dr. Sarah Chen (Dentist): gloves worn correctly, but gloves touched a keyboard mid-episode before hand hygiene was performed — a realistic minor finding, captured in the notes.
Confirm it saved
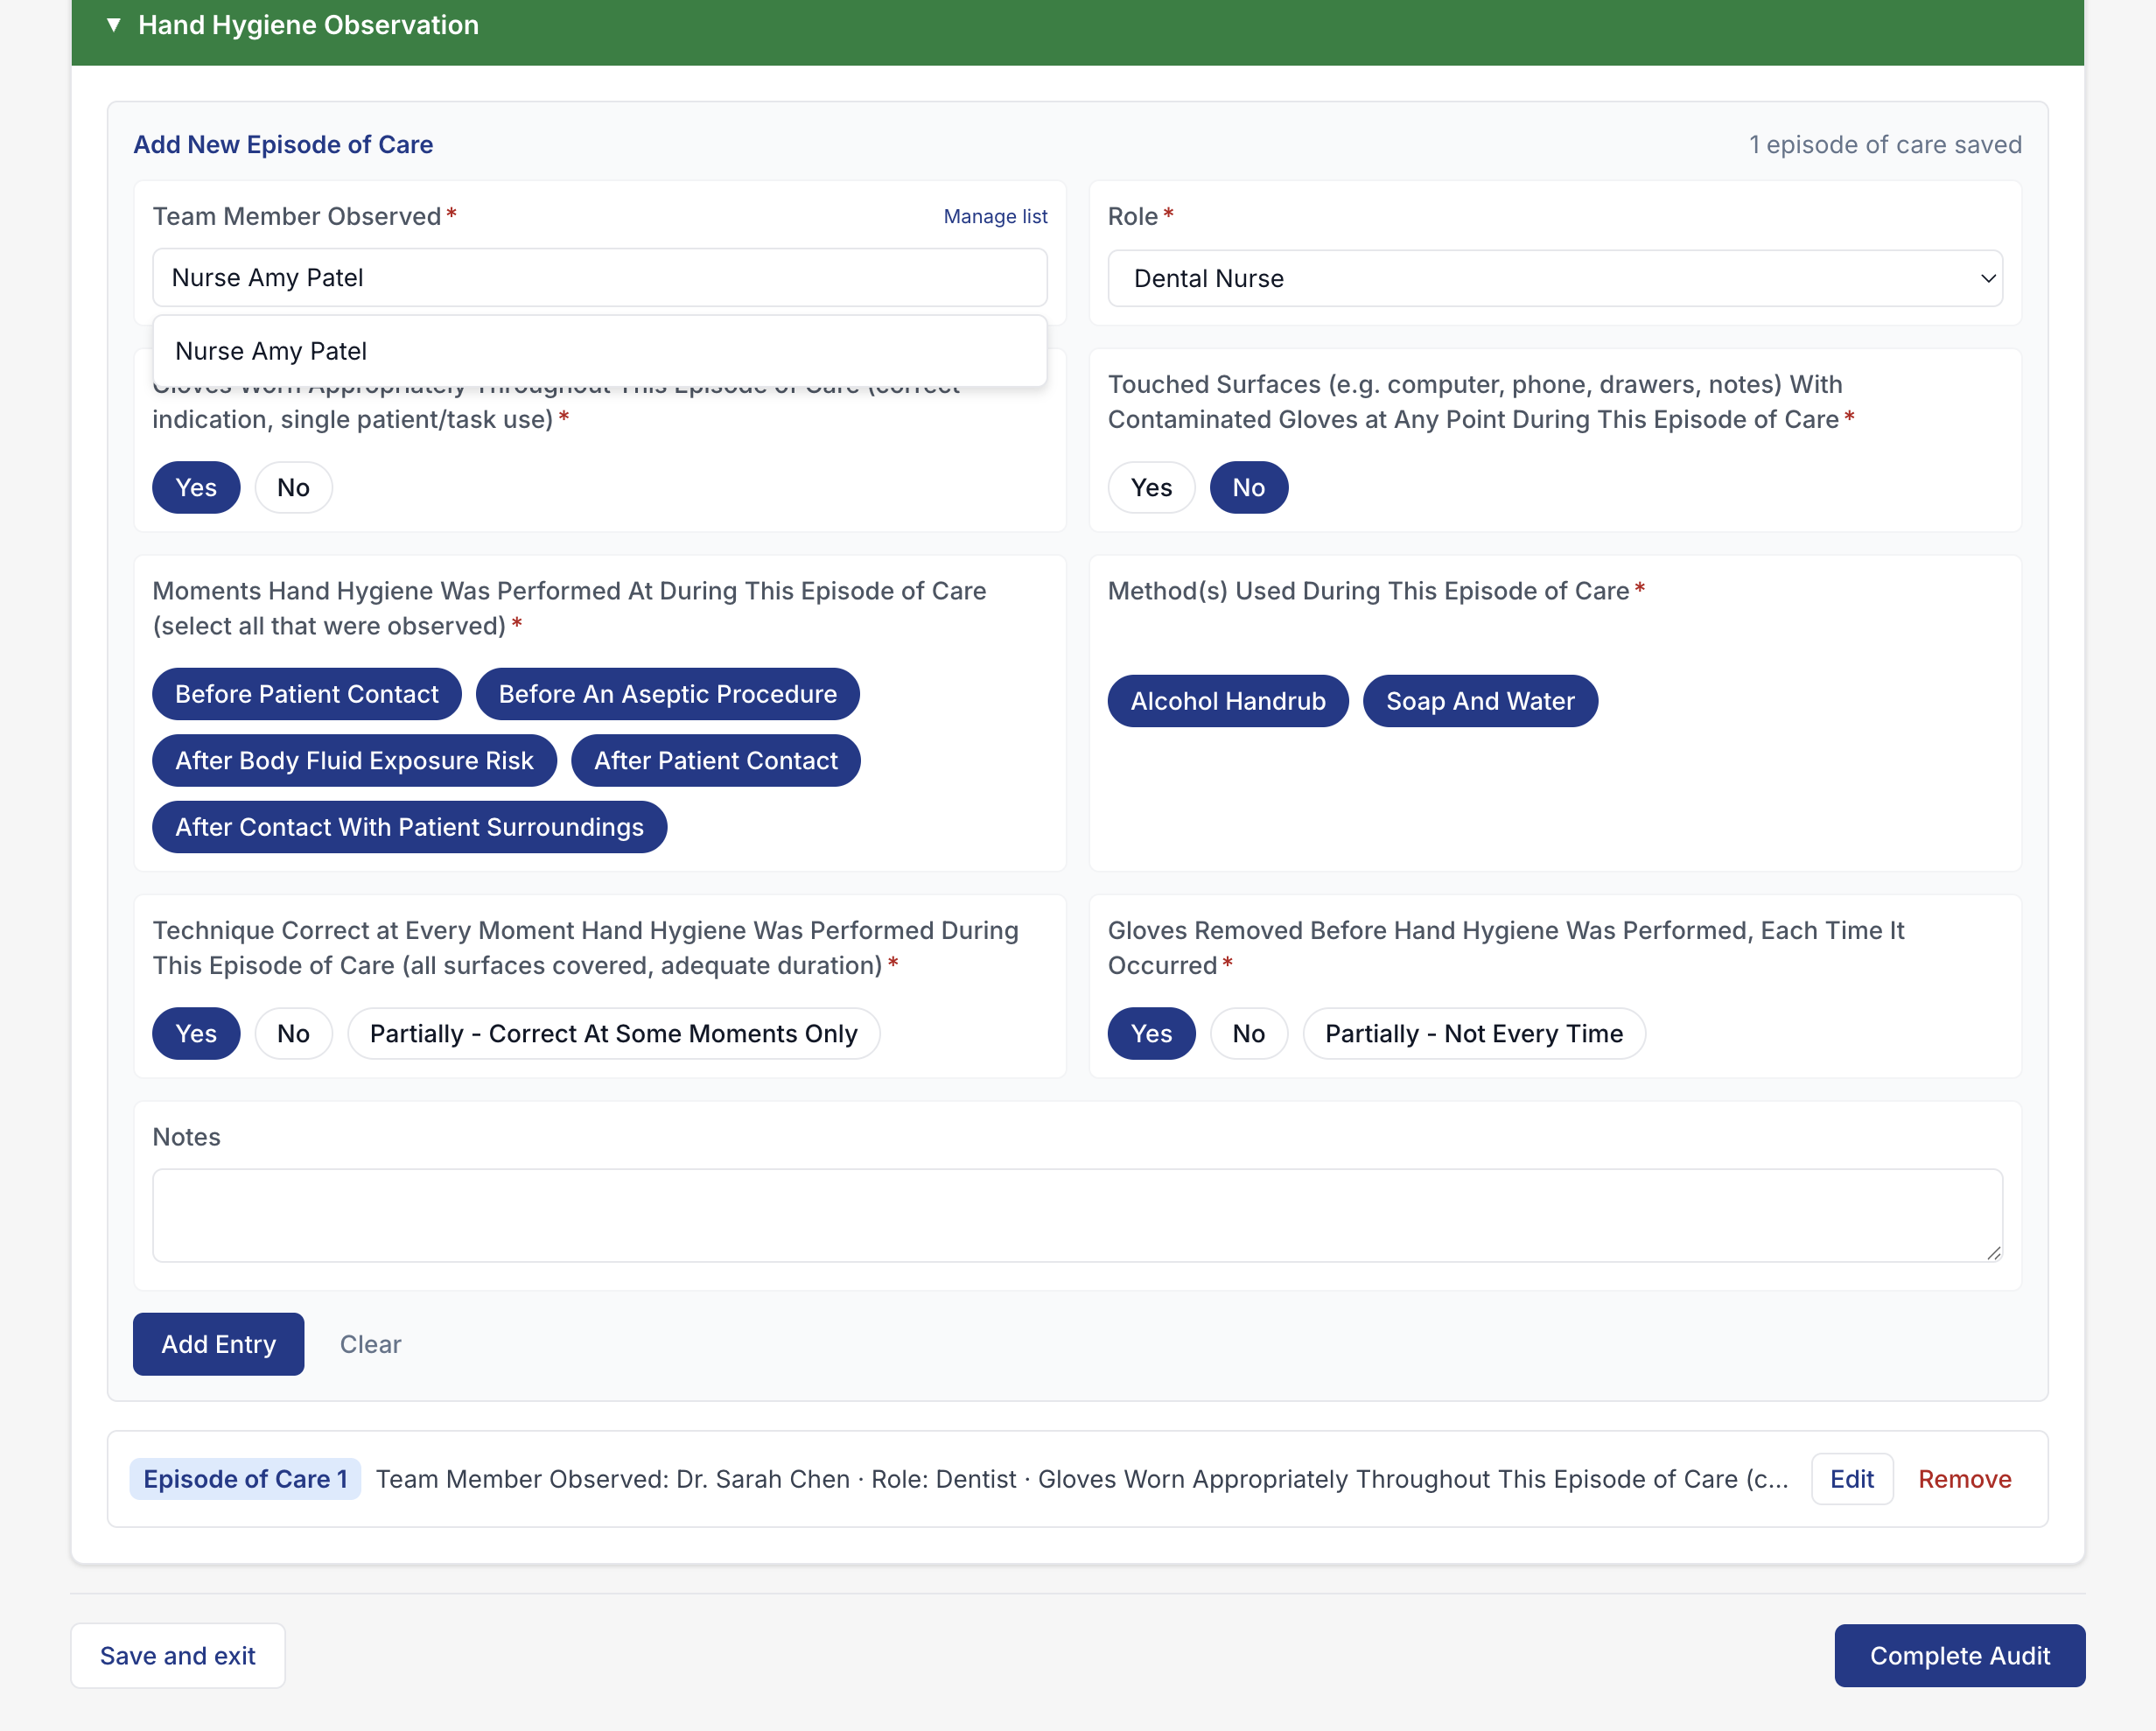
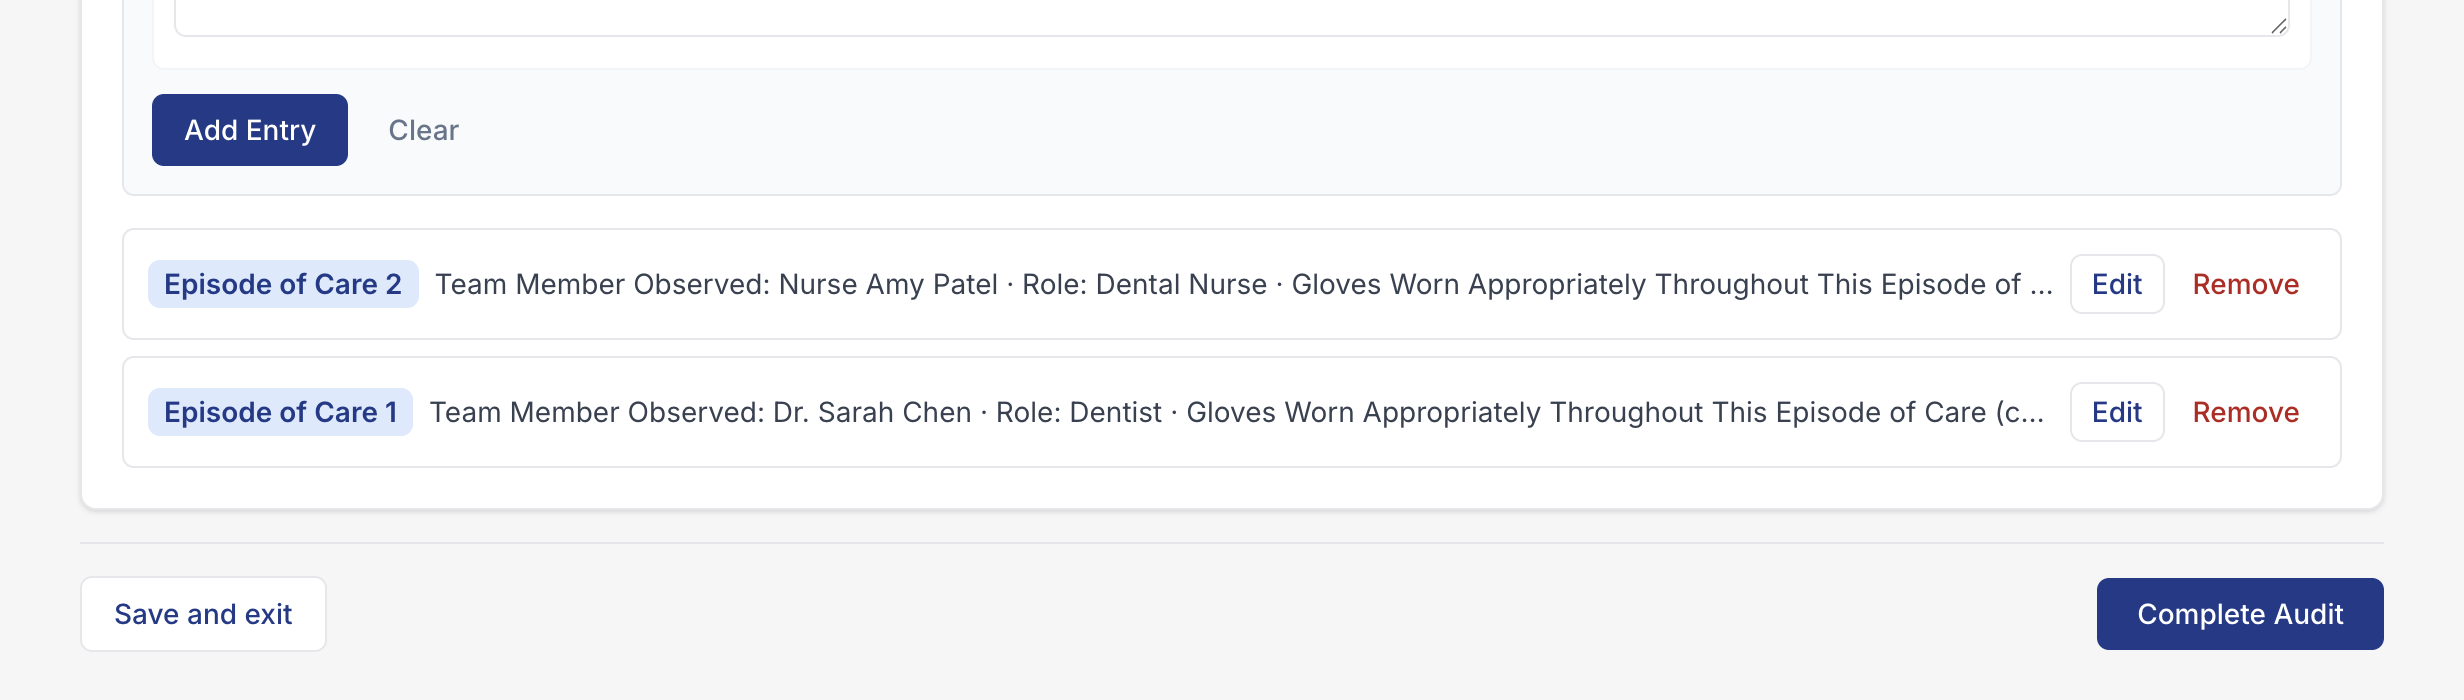
Clicking Add Entry saves the episode as a numbered record beneath the form, clears the form for the next entry, and flips the section header from navy to green with a running count — the app's way of showing a section has at least one saved record.

Repeat for each observation
We added a second, fully compliant episode for Nurse Amy Patel — every moment covered, correct technique, gloves changed appropriately — to give the audit a realistic spread of results rather than a single data point.
A real audit typically runs to a dozen or more episodes across a clinical session; two is enough to demonstrate the mechanics.
Complete the audit
Once every section has at least one record, two controls appear at the foot of the form.
Save and exit, or complete
Save and exit leaves the audit open for later — useful if you're auditing across a full day and adding entries as you go. Complete Audit locks in the current entries, marks the audit Completed, and takes you straight to its results.
Read the results
Completing an audit generates its results view immediately — no separate reporting step.
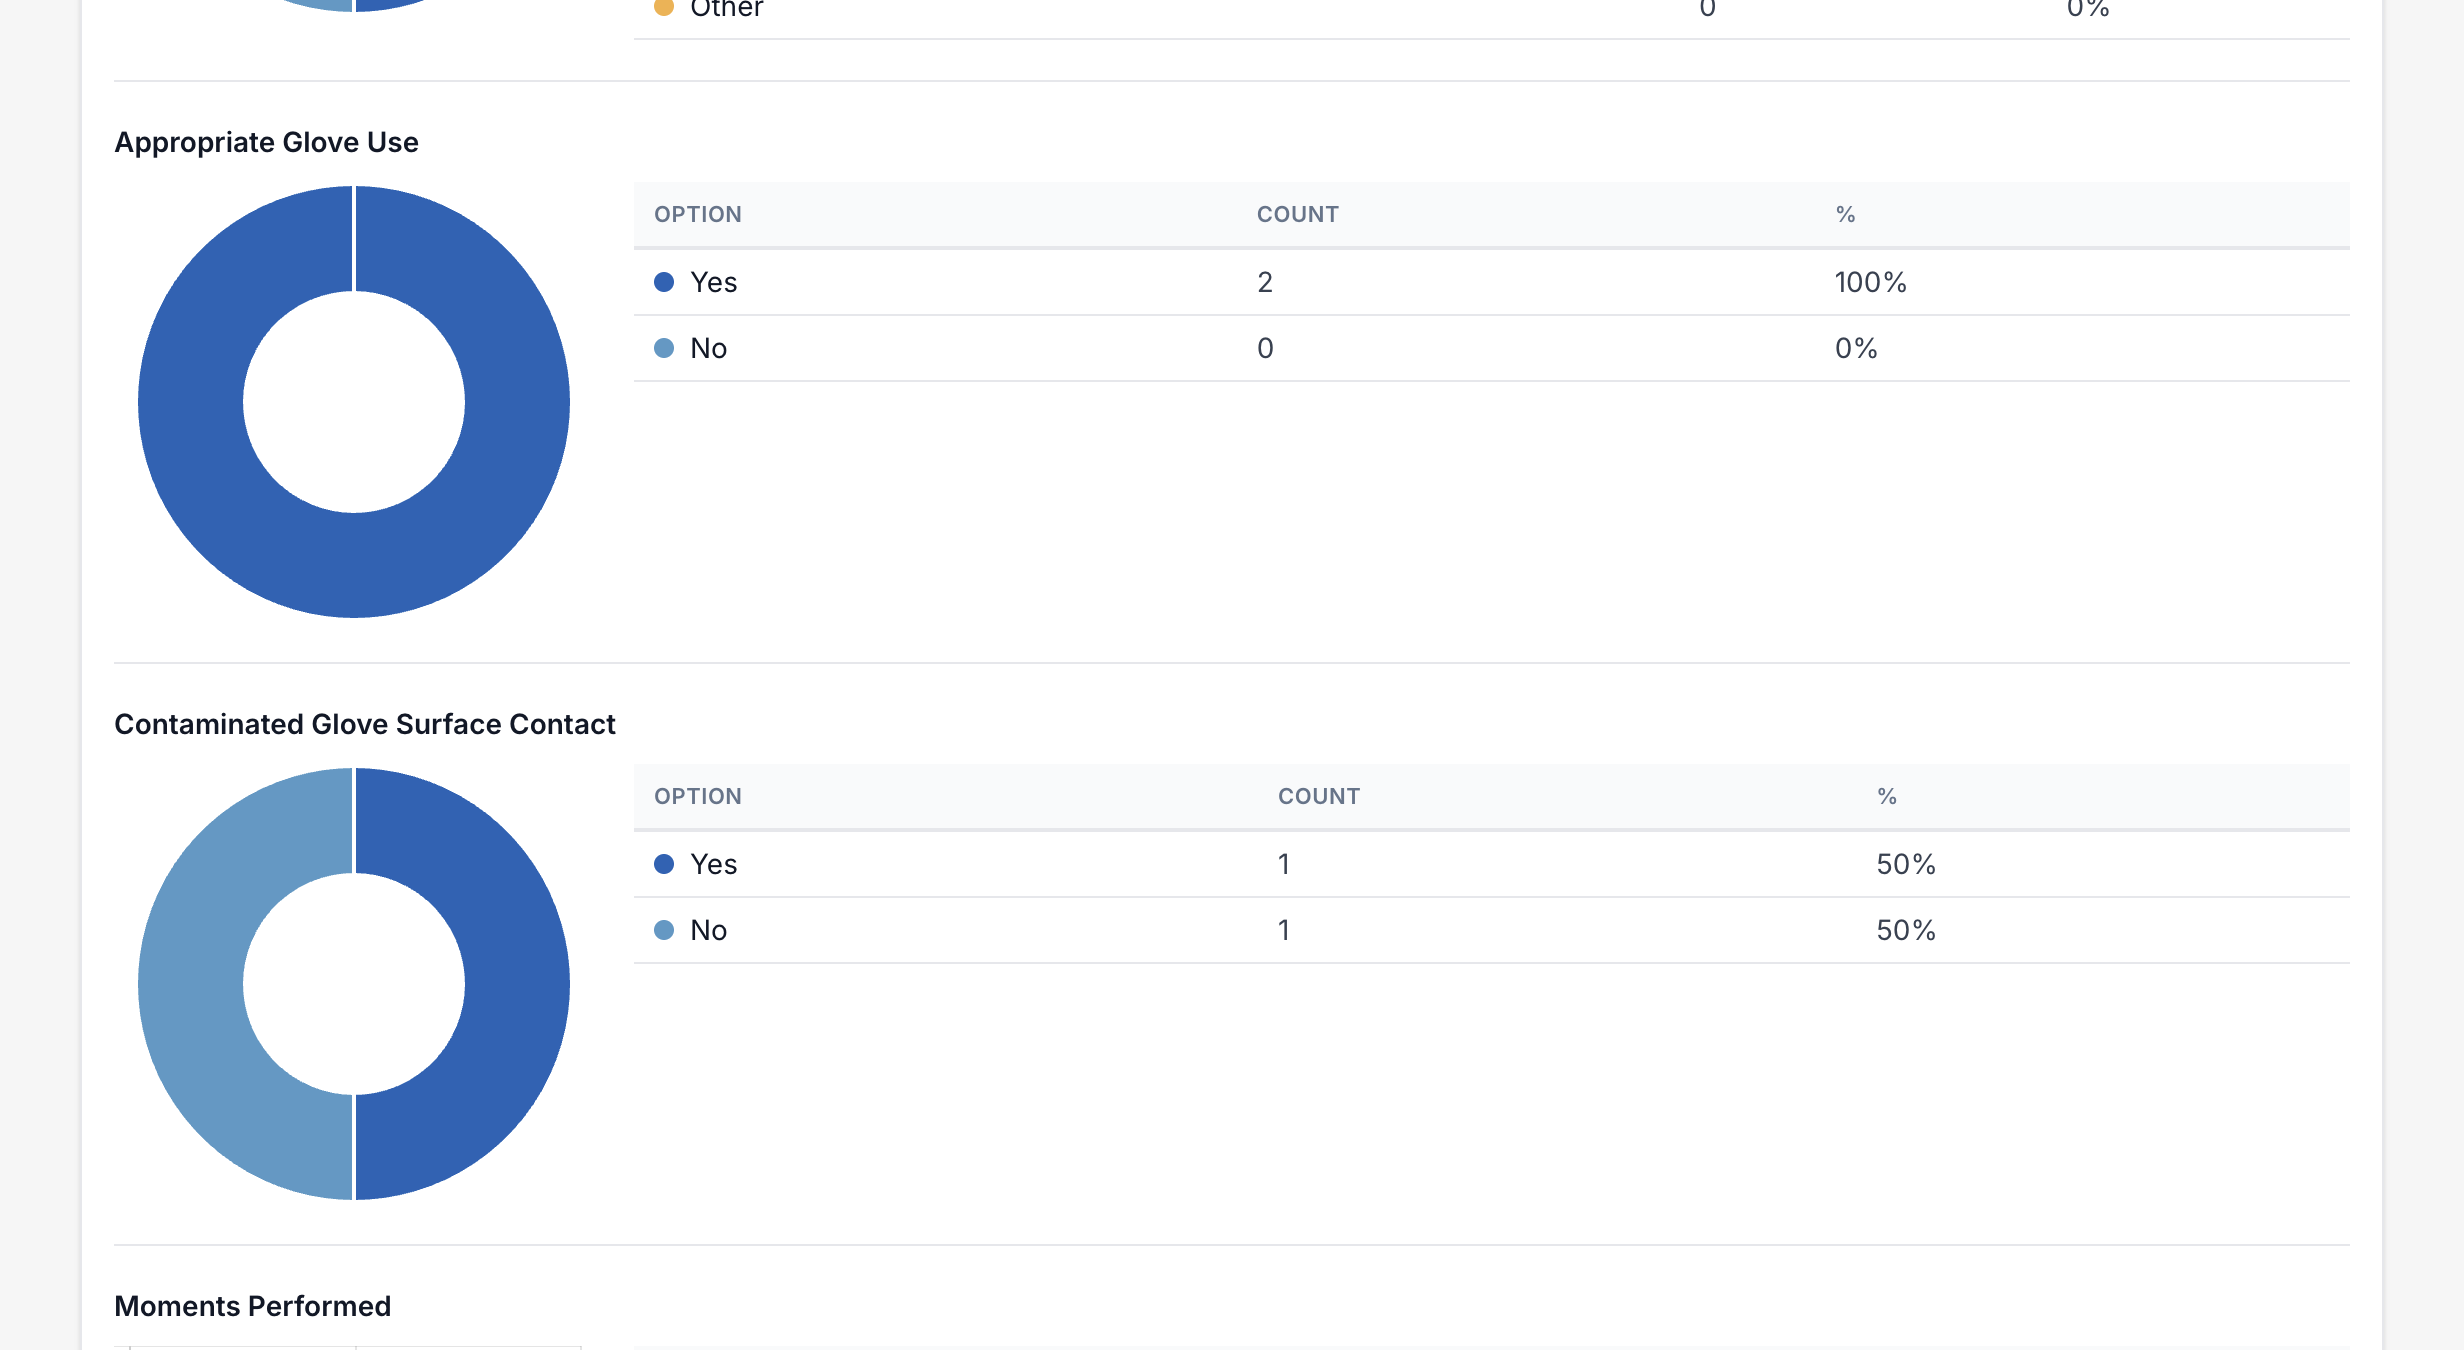
Charted, per field
Every field you recorded gets its own donut chart and count table, so patterns are visible without reading raw entries — here, 100% appropriate glove use, and one of the two episodes involved contaminated-surface contact (50%), the kind of minor finding a hand hygiene audit is designed to catch.
Add the discussion and action plan
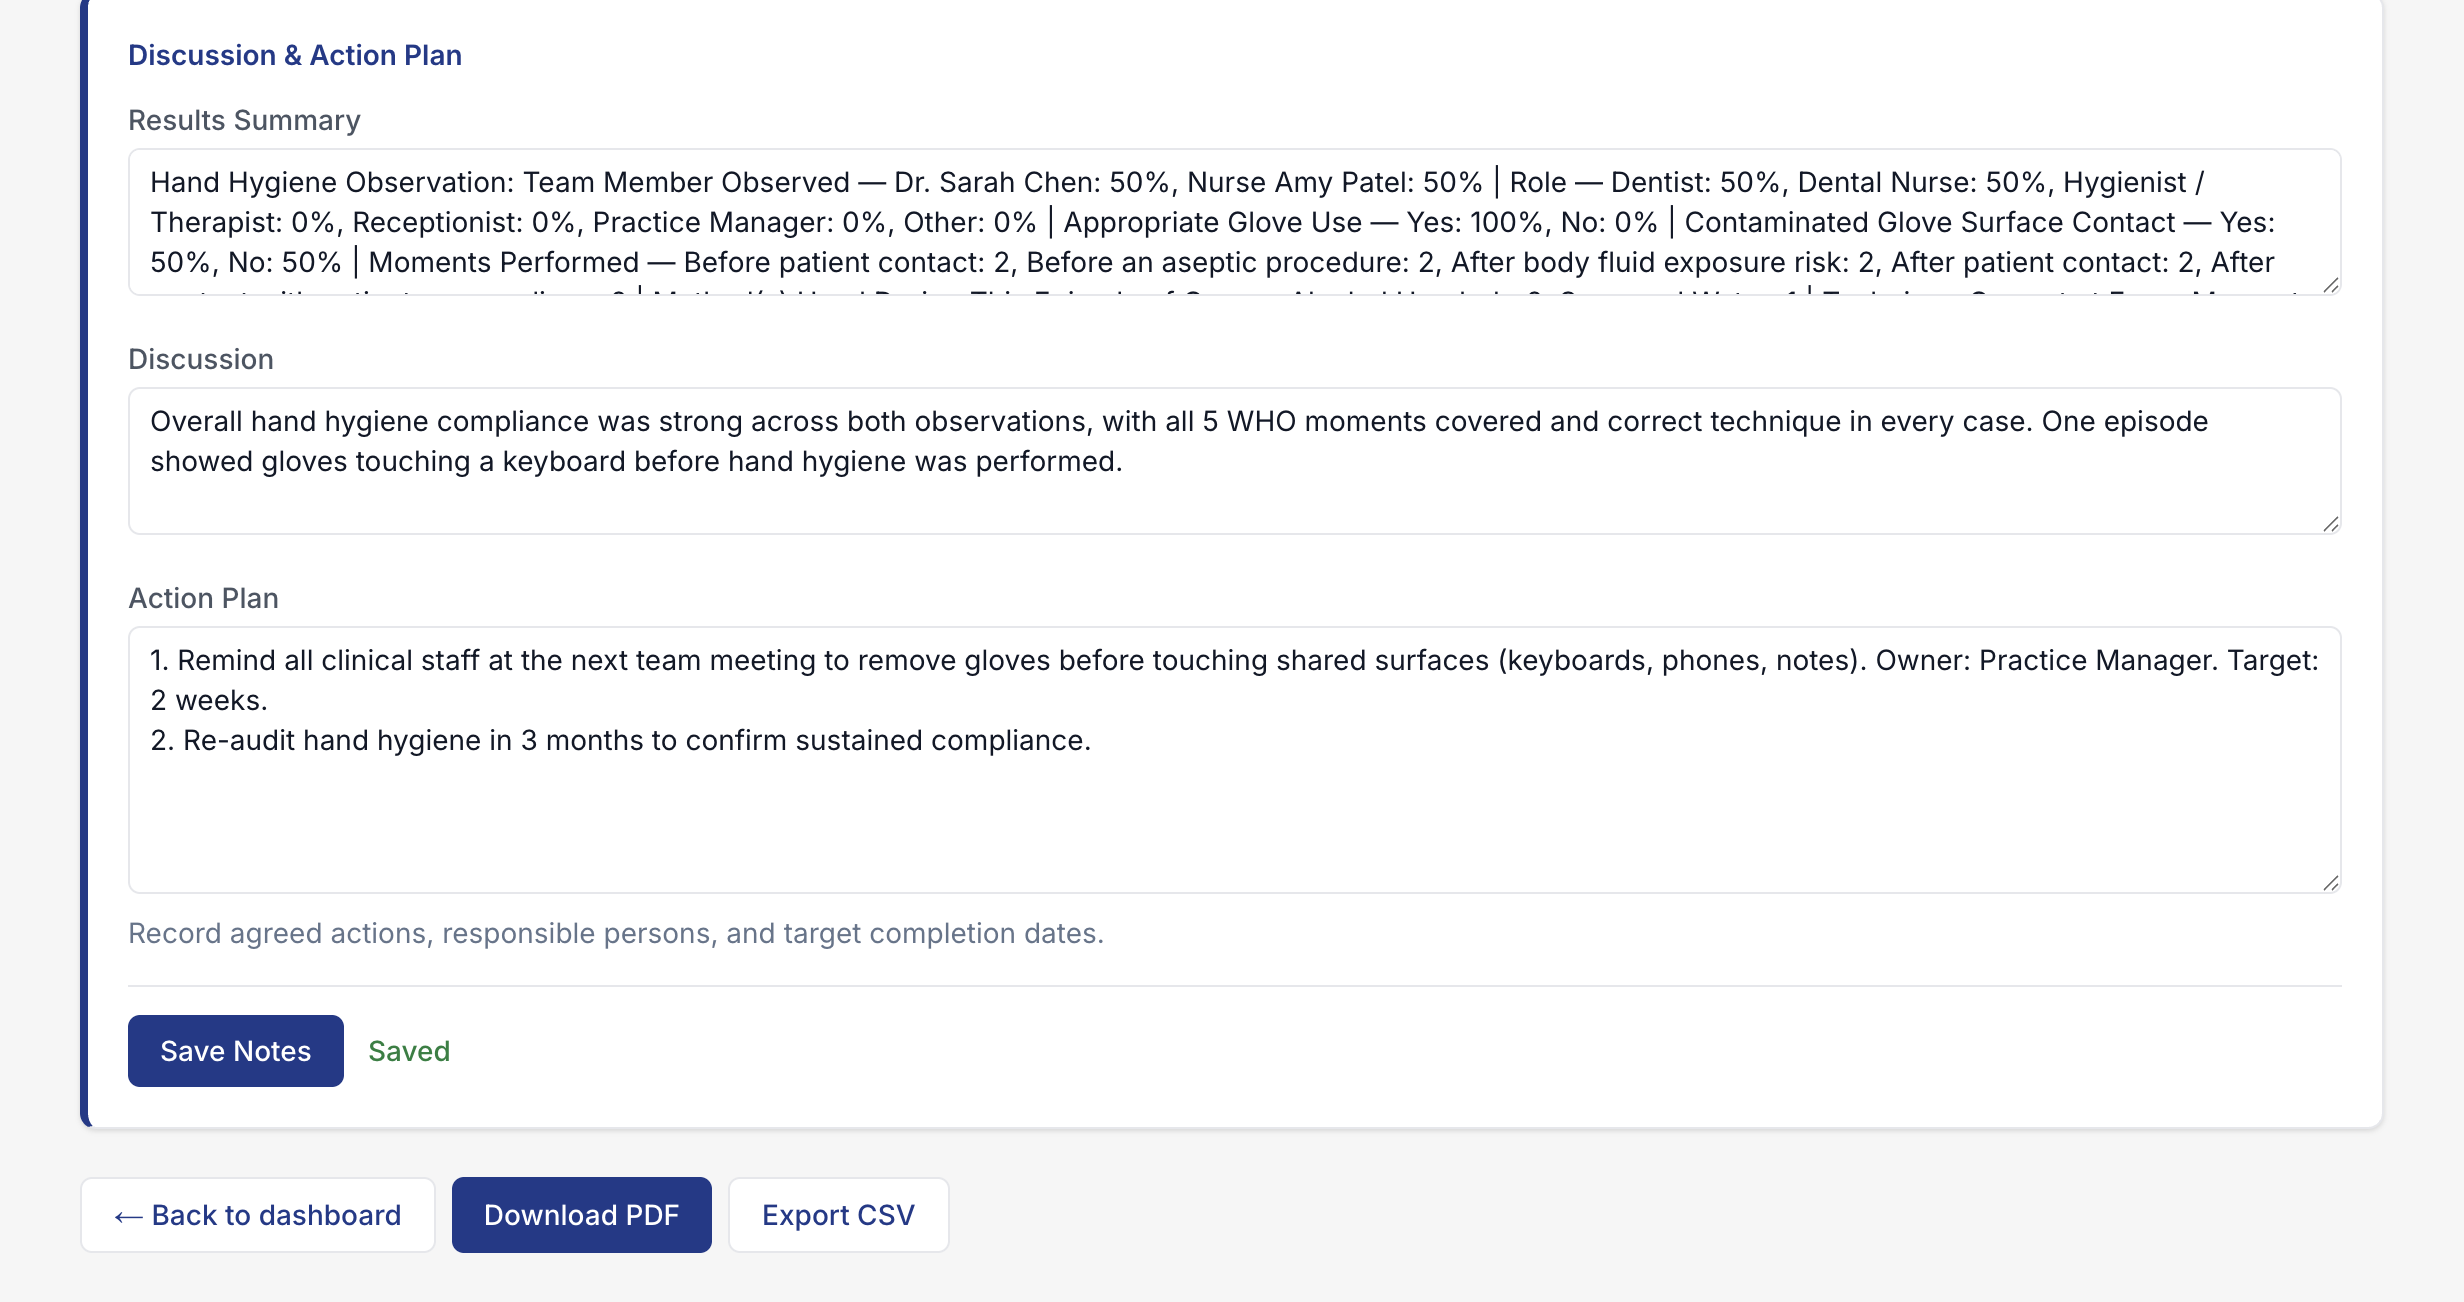
Below the charts, a Discussion & Action Plan panel auto-populates a results summary and gives you free-text fields to record what the findings mean and what happens next — exactly the narrative a CQC inspector or practice meeting expects alongside the raw numbers.
Export
Two controls sit beneath the action plan: Download PDF produces a print-ready report of the whole audit — details, charts, discussion and action plan included — and Export CSV gives you the raw per-episode data for further analysis. Back to dashboard returns you to the audit list, where the completed audit now shows its status and a link to view, edit, or re-export it at any time.
Recap
- Create — + New Audit → pick a type → fill in the header details (autosaves).
- Record — fill the section form, Add Entry, repeat for each observation.
- Complete — once every section has a record, Complete Audit generates the results.
- Review — read the charts, write the discussion and action plan, export to PDF or CSV.